Month: May 2017

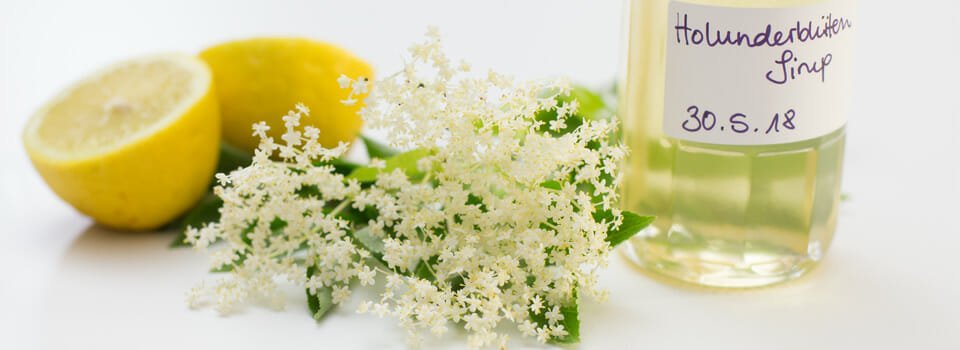
  • Elderflower syrup (cordial)

    Holunderblütensirup - Minh Cakes Hauptbild

    Homemade elderflower syrup

    • Servings: 2 l
    • Print

    Ingredients

    • 10 elderflower umbels
    • 1 liter (4 cups) water
    • 1.5 kg sugar
    • 10 g citric acid or 1-2 lemons

    Directions

    1. Pick the elderflower umbels in sunny weather, not right after the rain, or they will have no flavor. Place into the water without washing and marinate for at least 24 hours, up to 4 days.
    2. Strain the elderflower water through a kitchen cloth, then add the sugar and citric acid. Bring to a boil and leave to cook for about 5 minutes.
    3. Fill into steriilized glass bottles and close the bottles immediately. Leave to cool on the counter.

    If you love a more tart flavor, add some more citric acid or add lemon slices to your flowers while marinating. Autor: minhcakes.ch/en/elderflower-syrup

    Happy Syrup-making!
    Love,
    Xuân-Minh
    Xuân-Minh signature

    Zum Artikel

  • How to calculate cake sizes

    German version / Deutsch

    Hello! Today I’m going to answer the most frequently asked question by my clients and students. Which cake size should I bake / order for my event?

    The short answer: It depends! The most important factors that come into play, are the number of guests in attendance, but also what kind of food will be served, and how much!

    Minh Cakes Calculating Cake sizes Title image

    Now for the long answer:

    If your cake is going the be the main dessert, plan at least one serving for each guest. But if you are planning on serving a seven-course wedding feast, or having a buffet of several desserts, then it will be enough to order half the amount of servings, so each guests can get a half-serving.

    Of course, this leads to the next question:

    How big is a cake serving?

    This decision is usually up to the baker. This is why  all the serving charts you find on the internet are different –  because each bakery has decided on a custom serving size. Fondant cakes of today are usually filled with several layers of buttercream or ganache. This makes them quite rich to eat, compared to traditional European pastry cakes like Black Forest cake, that is very airy and filled with whipped cream. A wedding cake portion  does not have to be huge, nor does a children’s birthday cake because both groups of people usually are too full to eat big slices of cake. Also, do take into account that fondant cakes tend to be quite high, 10cm (4 inches) and more!

    Here at Minh Cakes, our standard serving size is 5 cm x 10 cm x 2.5 cm
    (2 inches x 4 inches x 1 inch)
    .

    For a wedding dessert, it’s a generous amount of cake. I’ve heard that in the UK, it is customary to serve only half this amount – the wedding cake is meant as a little teaser and not as full-fledged dessert.

    Method 1: Determine  cake size using volume calculations

    The way to determine the amount of servings per cake, is by using volume calculations (yes that’s geometry folks!)  My standard serving is  125 cm³ (8³ inches). Using cylindrical volume formulas, it’s easy to calculate the amount of servings per tier.

    A round cake is basically a cylinder. That’s why we can use this formula:
    Volume = radius square * π (Pi) * height

    Example

    Take a 20 cm (8″) diameter cake that ist 10cm (4″) high. The radius is 10 cm (4″).

    In cm: Volume of the cake: 10 cm² * π * 10 cm = 3141 cm³
    In inches: Volume of the cake: 4² inches * π * 4 inches = 201³ inches

    Now we just have to divide the volume of the cake, with the volume of the serving, and we’ll get the number of servings:

    In cm: Servings: 3141 cm³ / 125 cm³ = 25  servings
    In inches: Serving: 201³ inches / 8³ inches = 25 servings

    Result: A 20 cm (8″) cake that is 10 cm (4″) high, will yield 25 servings that are 2.5 x 5cm (1″ x 2″) large.

    This is the exact mathematical method. For each tier size I sell, I could calculate the geometrically correct number of servings:
    Minh Cakes Calculating Cake Sizes: Volume chart


    However… (yes, there’s always a BUT)… I don’t actually work with the numbers above. Why? There are three reasons:

    • Due to my preferred method of cutting (more on that later), some cake slices end up having more fondant & ganache and have to be calculated bigger then 125 cm3.
    • Other slices of cake are pierced with dowels.
    • And lastly, we do want to make sure we are generous with our brides.

    That’s why we declare a slightly  lower number of servings per tier in our sales. How is this calculated? I really recommend the next method…

    Method 2: Determine cake size using apps

    Since we aren’t all math geniuses, we need all the help we can get! And help comes in the form of some very useful smartphone apps. There are some very clever ones on the market (and by the way, they all use the basic formula above in their calculations!). My favourite app is called  Tiered Caker.

    It lets you easily configure the serving size and tier sizes that you have in your own kitchen. Then you send yourself the cutting guides by email!

    These are the 5 tier sizes that we sell, and the corresponding cutting guide. As you can see, the amount of servings per tier is slightly lower than in the chart above.  Note that the slices in the corners are a bit larger to account for fondant + ganache cover!
    Minh Cakes Tortengrösse berechnen: Schnittkarten

    You can find our actual chart in our Cake FAQ (in German for now).

    Now you know how to calculate the amount of servings for each tier size. As soon as you have these numbers, you can start to play around and combine them until you get the number  of servings you need for your next event.

    A few examples:

    10cm + 15cm
    (4+6″):
    19 servings
    10cm + 15cm + 20cm (4+6+8″):
    41 servings
    15cm + 20cm + 25cm (6+8+10″)
    73 servings

    I think I know what you next question is: How do I cut a cake following these cutting guides?
    The answer is coming in the next blog post! 🙂

    I hope this information has served you. I’d love to know if you have another way of calculating your servings – please leave comments & questions below!

    Love and happy calculating,
    Minh signature

    Zum Artikel

  • How to make a sugar mini rose (tutorial)

    Hello and welcome to my new cake blog in English! (You can still see all my posts in German here). I will translate them bit by bit as I go along!

    Today I’ve got a great tutorial for you: A very cute  sugar mini rose that is incredibly easy to make.

    It’s a perfect decoration for small sweets like cupcakes, mini cakes, cake pops and cookies!

    Minh Cakes sugar mini rose

    Mini rose video

    I made a video explaining the mini rose step by step for you here:

    These are the tools you will need for this project:

    • Sugar paste  (today I’m working with a 50%-50% mix of fondant and florist paste. You can also use  fondant with CMC)
    • Gel food color for the flowers (Sugarflair Rose) and leaves (Sugarflair Gooseberry)
    • Toothpicks
    • Some shortening
    • A large decorating tip (I’m using a Wilton #2A here)
    • A workboard
    • A rolling pin
    • plastic sleeve

    Minh Cakes Mini-Rose aus Zucker Tools

    First, knead your paste with a little bit of shortening, then color it to your liking.

    Minh Cakes Mini-Rose Tutorial

    Roll out your paste to 0,5mm approximately. Using the large end of your tip, cut 6 circles.

    Minh Cakes Mini-Rose Tutorial

    Put the circles in your plastic sleeve and thin out the edges by smoothing them lightly with your finger.

    Minh Cakes Mini-Rose Tutorial

    Lay your circles in a straight line. They should overlap by about a third.

    Minh Cakes Mini Rose Tutorial

    Start with the bottom circle and roll it tightly (like a sleeping bag), but with very little pressure. You don’t want to squash it!

    Minh Cakes Mini Rose Tutorial

    Cut your roll in half – you’ll get two flowers!

    Minh Cakes Mini Rose Tutorial

    Squish the cut surface together a little bit.

    Minh Cakes Mini Rose Tutorial

    Roll back the outer petals to open then. You’ve just made a mini rose!

    Minh Cakes Mini Rose Tutorial

    For leaves, make green circles using the same technique as above. Use your decorating tip to cut two leaves from each circle.

    Minh Cakes Mini Rose Tutorial

    Pinch each leaf on the end to create a vein.

    Minh Cakes Mini Rose Tutorial

    Tada! Now you just need to bake some cupcakes to place your mini roses on.

    Minh Cakes Mini-Rose aus Zucker Resultat

    Have a beautiful Sunday!

    Happy rosemaking,
    Xuân-Minh signature

    Did you make these roses? Then please leave a comment below!

    Zum Artikel

  • Strawberry drip cake with cream cheese filling – recipe

    Hello and welcome! I’m finally blogging for you in English! This strawberry drip cake is the first blog post that I’ve prepared for you.

    I will translate the rest of the blog as I go along. So if you click on any other posts and they are still in German, thanks for understanding! If you want to know what I wrote in them, I invite you to use Google Translate.

    Today’s recipe for you is a fluffy strawberry drip cake with cream cheese filling, covered in white ganache and decorated with strawberry ganache, and fresh berries. Perfect for surprising your mom for mother’s day, a loved one for their upcoming birthday – or any early summer celebration!

    Minh Cakes Strawberry Drip Cake title image

    I know it’s not quite strawberry season yet. But the weather was so bad in the last few weeks, that I needed something to brighten my mood. As soon as our strawberries are ripe, this cake is going to be even better to eat than to look at.

    Be warned: This project, although it looks deceptively simple, can easily take an entire day to make because there are many elements to it! The good news is that you can prepare most of the elements in advance: The sponges, the strawberry puree, the ganache, the Swiss Meringue buttercream, the sugar flowers and the meringue kisses. If you freeze the sponges and the buttercream, just remember to thaw them one day in advance. I’ve written some tips about scheduling your baking in this post.

    The sponge is based on the very versatile  Easy Genoise – this time with strawberry flavor. We’re adding strawberry puree to the batter. To make sure the batter has enough structure, I’m adding a little bit more flour. And the baking soda will combine especially well with the sour elements of the batter (fruit and buttermilk) and make it rise nicely.

    White ganache is pretty sweet – we are countering the sweetness with a generous pinch of salt in the ganache. Salt is great at cutting through overly sweet desserts.

    And a last trick I recently learned from Bravetart: You can optionally add a few drops of rosewater to your strawberry puree to enhance the flavor.

    Minh Cakes strawberry Drip Cake

    Decoration-wise, please be as creative as you like! On my strawberry drip cake, you’ll find chocolate bark made from candy melts, meringue kisses, handmade sugarflowers, fresh berries – and yes! Luxemburgerli by Sprüngli, the best in Zurich 🙂

    Without further ado, here is the Strawberry drip cake recipe for you:

    Strawberry drip cake by Minh Cakes

    • Servings: about 8
    • Print

    Ingredients

      For the strawberry cake (15cm (6″) diameter, 3 layers):
    • 100 g sugar
    • 2 eggs
    • 1/4 teaspoon salt
    • 100 ml buttermilk (plain or strawberry-flavored)
    • 94 g Alba-oil
    • 120 ml strawberry puree (see below)
    • 200 g flour
    • 1.5 teaspoon (8 g) baking powder
    • 0.5 teaspoon (4g) baking soda
    • Optional: Pink food coloring
    • For the strawberry puree:

    • 500 g strawberries
    • 250 g jam sugar (sugar with pectin)
    • 1 tablespoon rosewater (optional)
    • For the Cream Cheese filling:

    • 160 g Swiss Meringue Buttercream
    • 40 g Philadelphia
    • 40 g Mascarpone
    • 2 tablespoons instant vanilla pudding powder (containing modified cornstarch, as a stabilizer)
    • For the white ganache:

    • 300 g white chocolate, chopped
    • 100 ml heavy cream
    • 1 large pinch of salt
    • For the strawberry ganache:

    • 100 g strawberry puree (see above)
    • leftover white ganache from above, after covering the cake
    • Decorations: Fresh strawberries Sugar sprinkles Chocolate bark (homemade or store-bought) Meringue Baisers Macarons Sugar flowers etc…

    Preparation

    Make the strawberry puree Wash the strawberries, dry them well and cut them in fours.

    Put them in a saucepan with the gelling sugar and bring to a boil, stirring from time to time.

    Lower the heat and leave to simmer for 10-15 minutes. Remove the pan from the heat and stir in the rosewater, if using. Strain the strawberries through a meshed sieve. You can freeze the pulp for a future buttercream, today we are only using the reduction. Let the puree cool down.

    Bake the cake Preheat the oven to 180 C (350 F). Line a 15cm (6″) baking pan with baking paper, or grease and flour it.

    Mix flour, baking powder and baking soda in a separate bowl and set aside. Place sugar, eggs and salt in the bowl of your mixer and whip them together for at least 10 minutes on high speed.

    In a separate bowl, stir together the buttermilk, oil, strawberry puree and food coloring (if using – without the food color, your cake will be brown). Turn your mixer to the slowest speed and add the liquid to the eggs and sugar (not too fast, not too slow). Mix for 30-60 seconds, until just combined.

    Now take your flour mixture and fold it very gently into the egg cream. Your mixer should be going at minimum speed, or you can even do it by hand. Fold gently until just combined.

    Immediately pour the batter in your baking pan and place in the oven for approx. 40 minutes, or until a skewer comes out clean. Leave on a cooling grid to cool, remove from the pan after 10-15 minutes. Wrap in cling film as soon as the cake has cooled down. Chill it prior to torting and filling.

    Make the ganache Chop the white chocolate.

    Heat the heavy cream and the salt in a saucepan until it is just below boiling point (do not walk away from it!). Pour it over the chocolate and let it rest for 1-2 minutes, stir by hand and then use a stick blender to emulgate. Be careful to not create too many air bubbles. Leave the ganache to cool at room temperature, until it has the consistency of creamy peanut butter.

    Make the cream cheese filling Make 160g (or more) Swiss Meringue Buttercream, following my recipe.

    Bring the Philadelphia und Mascarpone cheese to room temperature and mix together briefly. Add the instant vanilla pudding powder and wait a few minutes for the mixture to thicken. Fold the cheeses into the SMBC gently, by hand. Do not stir too long.

    Torte and fill the cake: Torte the chilled cake into three layers and fill it with two layers of cream cheese buttercream. You will need approx. 120g buttercream per layer. Chill it for another 30 minutes.

    Cover the cake with ganache: Mask the cold cake with the white ganache. A turntable and an angled spatula are really helpful tools to have for this. Chill for another 30 minutes.

    Make the strawberry ganache Briefly melt your leftover white ganache (you should have about 100g left) and stir in 100g strawberry puree. Whip the mixture on high speed in the mixer for a few minutes, then drip it over the cold cake (you can find a video with my dripping technique in this post).

    Assemble! Now comes the fun part! Place all your decorations on a large plate, so you don’t have to run around looking for them. Place them on the cake, however you like. There is no right or wrong here! Start with the largest elements, then add middle-sized ones, and the smallest last. The ganache stays soft for quite a while, so you have time to adjust your decorations. Put the sprinkles on last, so the don’t sink into the liquid chocolate.


    Note

    This cake keeps 1-2 days in the refrigerator, but it is best enjoyed at room temperature – so take it out of the fridge at least 4 hours before serving.

    minhcakes.ch/en/strawberry-drip-cake


    Mmmmh… enjoy!

    strawberry Drip Cake 04

    Have fun making this strawberry drip cake! If you have questions or have made this cake, please leave a comment below!

    Love and happy baking,
    Minh signature

    Zum Artikel