Recipes

  • Swiss Meringue Buttercream Recipe

    Today I have for you our favorite cake filling recipe: Swiss Meringue Buttercream or SMBC!

    Swiss Meringue Buttercream Minh Cakes SMBC

    Swiss Meringue buttercream is our first choice of frosting for cupcakes and cakes, because it’s very stable, has a long shelf life and is wonderfully fluffy. By heating our meringue to 70 degees Celsius, we make sure to pasteurize the egg whites, so it can be enjoyed by everyone!

    While making SMBC can be a little tricky at first, once you master the temperatures of the ingredients, it should come together really nicely. I do recommend using a thermometer while making this buttercream – you can find inexpensive ones in most household stores.

    Recipe for Swiss Meringue Buttercream

    • Servings: 1kg / 4 cups
    • Print

    Ingredients

    • 250 ml  / 1 cup egg whites (approx. 8 eggs, we tend to use pre-bought egg whites in a carton)
    • 300 g / 1.5 cups sugar
    • 1/2 tsp salt
    • 500 g / 4.5 sticks soft butter, at room temp (at least 22 degrees Celsius)


    Preparation

    Place sugar, egg whites and salt in a large bowl and heat to 70 C / 158 F over a gently simmering water bath. Stir and scrape the edges with a rubber spatula every 2 minutes or so – you don’t want the egg white to coagulate. Use a thermometer to measure the temperature.

    As soon as the mixture hits the right temperature, transfer it to a clean mixer bowl immediately. Beat it with a whisk on medium-high speed, until you have a stiff meringue. Keep beating the meringue until it has cooled down below 30 C / 86 F.

    If using a stand mixer, swap the whisk attachment for a mixing paddle. Turn the mixer on the lowest speed (this is very important!) and add the butter slowly, one heaped tablespoon at a time. Make sure your butter is really soft – you should be able to cut through it with a knife effortlessly. We must ensure that the meringue and the butter are at equal temperatures – that will make the water-based egg white and the fat-based butter emulsify (mix together) more quickly, while losing a minimum of the volume of the air bubbles in the meringue.

    Then comes the easy part: Sit back and wait! Keep the mixer on the lowest setting. Don’t panic if the mixture looks liquid or curdled. The buttercream will go through what I call the “cottage cheese” stage. And soon afterwards, it should emulsify beautifully and look like a fluffy buttercream.

    Once it has reached this stage, you can turn the mixer on high again and beat your buttercream on medium-high for 5-10 minutes, to incorporate some more air. You will notice it will get a lot lighter in color.

    Your buttercream is done! Now you can add color and flavors of your choice.

    The moment when SMBC emulsifies… it’s like magic, every time!

    Here are some flavoring ideas for Swiss Meringue buttercream:

    If you make SMBC, please leave a comment!

    Thanks and happy baking,

    Minh signature

    Zum Artikel

  • White drip ganache recipe

    Our recipe for dark drip ganache is trending on the blog these days! Of course I’ve also been asked for the recipe with white chocolate. So without further ado: Here’s the white drip ganache recipe for you!

    White Drip Ganache

    White chocolate is a bit more finicky than dark chocolate, because it melts (and breaks) at lower temperatures than dark chocolate. That’s because white chocolate, unlike dark oder milk choc, contains no cocoa liquor, but only cocoa mass – and a whole lot more of cocoa butter.

    When making white ganache for dripping, you will only use half as much heavy cream than for the dark drip ganache. Optional: For a really nice sheen, you can add half a teaspoon of glucose or corn syrup.

    To make white drip ganache, you will need:

    • 200 g white chocolate
    • 100 ml heavy cream
    • 1/2 tsp corn syrup
    • a chilled cake to be dripped

    In order to not overheat the ganache, I usually heat the cream and chocolate together, in burts of 30 seconds of the microwave. It’s important to stir well after each melting round.
    White Drip Ganache

    After 2 or 3 rounds in the microwave, your chocolate should be melted. Let it cool down for 1-2 hours, until it flows in thick ribbons from your spatula. White Drip Ganache

    Grab your chilled cake from the fridge only moments before you are ready to drip! (On the turntable today: Chocolate ganache cake :))
    White Drip Ganache

    Then you can start dripping! Personally, I prefer to use a spoon, doing the sides first. Then I finish the top with an angled spatula.

    Here’s a video for you:

    Ganache Dripping works on any cold surface: Fondant, Buttercream, Ganache, Meringue.

    Here’s the print version of the recipe for you:

    White drip ganache

    • Servings: 300 g
    • Print

    Ingredients

    • 100 ml heavy cream
    • 200 g white chocolate, chopped
    • 1/2 tsp glucose syrup or light corn syrup (optional)

    Directions

    Combine the chopped chocolate and the cream in a microwave-safe bowl.

    Heat the mixture during bursts of 30 seconds in the microwave, at 75-80% power. Between each interval, stir with a spatula for at least 30 seconds.

    You can emulsify the ganache with a stick blender. That will also help dissolve the last lumps of chocolate. Just be careful not to incorporate too many air bubbles.

    Stir in syrup, if using.

    Let ganache cool for an hour or two, until the consistency is very thick.


    Please leave questions and comments below – Happy dripping!

    Love,
    Minh signature

    Zum Artikel

  • Drip ganache recipe

    Last week we had our Drip Cake class here at the studio. This post is dedicated to this most wonderful of ingredients – liquid chocolate or drip ganache!

    Minh Cakes Drip Ganache recipe title image

    There are many different recipes for ganache. The proportions of chocolate to cream can vary, depending on the use. Some recipes use heavy cream or butter, or both!

    For drip ganache, you need equal amounts of semi sweet chocolate and cream (a ratio of 1:1). Optional: You can add a tablespoon of corn syrup or glucose for a nice shine!

    Minh Cakes Drip Ganache recipe ingredients

    The cream is heated until just below the boiling point, then poured over the chocolate and stirred, until the consistency is smooth. Then the syrup is added, if using.

    Minh Cakes Drip Ganache recipe nice shine

    The drip ganache mixture then has to rest for about 1-2 hours, until it has thickened slightly and flows from your spatula in broad ribbons:

    Drip Ganache GIF

    Then you can begin dripping! There are several techniques, but I like using a spoon best for maximum control for the sides – and then filling up the top of the cake with an angled spatula.

    Here’s a video for you:

    Very important: The cake should be chilled thoroughly underneath, so that the chocolate sets fast. Otherwise, your chocolate will just flow off the sides of the cake and make great puddles on the bottom.

    You can drip ganache on fondant, buttercream, hardened ganache, meringue – whatever you like, the main thing is that is must be cold!

    Here’s the recipe for you to print and use:

    Drip ganache (truffle ganache)

    • Servings: 500 g
    • Print

    Ingredients

    • 250g / 1 cup heavy cream
    • 250g semi sweet chocolate, chopped
    • 1 tablespoon glucose or light corn syrup

    Preparation

    Place the chocolate pieces in a large bowl.

    Pour the cream into a saucepan and heat it on medium-high. Careful of the overflow if you let it boil inadvertently! Just before it starts boiling, remove from the heat.

    Pour the cream over the chocolate and let it rest for 1 minute.

    Stir the mixture gently. A silicone spatula is best. We want to try incorporating as little air as possible into the chocolate. You can use a stick blender, leaving it at the bottom of the bowl, without going up and down.

    Stir in the syrup, if using.

    Leave the drip ganache to rest for about 1-2 hours, until it has thickened slightly and flows from your spatula in broad ribbons.

    Start dripping!


    You can drip cakes, cupcakes, ice cream, cake pops and more. If you leave the chocolate to harden even more, you can then use it to make truffles. Roll them into balls and dip them in cocoa powder. I’m sure you can come up with more uses!

    Drip Ganache Cupcakes by Minh Cakes

    Enjoy – please leave questions and comments below!
    Happy dripping!

    Love,
    Minh signature

    .
    .
    .
    .
    .

    P.S.
    Would you like to learn to bake a decorate a drip cake from scratch? We have a class just for that: Drip Cake Tageskurs ( in German for now): With baking, making meringue kisses, meringue filling, chocolate towers and more!
    drip cake class

    Zum Artikel

  • Strawberry puree recipe

    It’s strawberry season! Strawberries are one of my favorite fruits. I love to use them all year round. Since the season is so short, I like to make strawberry puree to preserve them for later use. This week I’m making a whole batch of puree.

    Minh Cakes Strawberry Puree preserves

    Making puree is a great way to store strawberries for upcoming cakes or for next winter. What’s the difference between puree and jam? The fruit is only cooked very briefly, so it keeps a fresh taste. I also only use half the sugar than for strawberry jam or jelly.

    Because less sugar is used, the puree doesn’t have such a long shelf life at room temperature. But it freezes really well and keeps in the freezer for several months. I usually freeze it in small batches so I can just take what I need.

    What can you use strawberry puree for?

    Minh Cakes Strawberry Puree preserves

    How to make homemade strawberry puree

    The detailed recipe for printing is below! You can use as many strawberries as you like. Wash them, dry them and hull them. Then cut into quarters.

    Minh Cakes Strawberry Puree preserves

    Place the berries in a large saucepan and cover with jam sugar. (Jam sugar contains the natural gelling agent pectin – this prevents our strawberry puree from being too liquid).

    Minh Cakes Strawberry Puree preserves

    Bring to berries to a swift boil and let them simmer on medium-high for no longer than 5 minutes.

    Minh Cakes Strawberry Puree preserves

    Puree your strawberries using a stick blender. Optional: You can flavor your puree with vanilla extract and, or rosewater (a trick I learned from Bravetart!).

    Minh Cakes Strawberry Puree preserves

    Fill your puree into tupperwares (for freezing) or into sterilized canning jars (for the fridge). Let cool completely before placing in a cooling device.

    This is the full recipe:

    Strawberry puree by Minh Cakes

    • Servings: approx. 500 g
    • Print

    Ingredients

    • 500 g strawberries
    • 250 g jam sugar (with pectin)
    • Optional: 1 tsp vanilla extract
    • Optional: 1 tsp rose water

    Preparation


    Wash and dry the strawberries, then hull them and cut into quarters. Place in a saucepan with the jam sugar and bring to a boil. Cook for 5 minutes, then remove from the heat and let cool for 10 minutes. Stir in the extracts, if using. Blend with a stick mixer blender or regular blender. Fill into tupperwares or sterilized canning jars.

    Shelf life: At least 2 weeks in the fridge, 6 months in the freezer.

    Uses:

    • To flavor Swiss Meringue Buttercream or American Buttercream
    • Bake strawberry cake
    • As a light jam
    • Great ingredient for smoothies
    • As a müesli topper
    • To flavor your plain yoghurt
    • … for many other desserts

    minhcakes.ch/strawberry-puree


    Have fun pureeing! As always, please leave your questions in the comments.

    Love,
    Xuân-Minh signature

    Zum Artikel

  • Red velvet cupcakes with cream cheese – recipe

    Today I’ve got a very popular recipe for you:  Red Velvet Cupcakes with Cream Cheese Buttercream.

    If you’ve never heard of red velvet before: It’s a very popular chocolate cake flavor from the US, traditionally decorated with a creamy frosting. People liked to eat it 100 years ago! Back then, the red color was due to the cocoa powder, back then it was not alkalized and turned red from a reaction with the buttermilk. This cake used to be called “devil’s food” cake!Minh Cakes - Red Velvet Cupcakes Rezept

    Today the name is more elegant – “red velvet”. Nowadays, cocoa powder is made alkaline during the production (“dutch process”) and doesn’t turn red anymore. So bakers typically add red food coloring or beet juice to help develop the traditional color. Baking soda also helps the color turn red – but only if used in large quantities, which isn’t really advisable for taste.

    Red Velvet cake has a very mild flavor. It contains a pinch of cocoa, some buttermilk and vanilla extract. The red color makes it fun to eat – and the oil and buttermilk give it a fluffy and velvety consistency. The tartness of the cream cheese goes perfectly with this cake.

    Thanks to the TV series “Sex and the city” and the Magnolia Bakery, red velvet cupcakes have gained worldwide fame.

    And now you can make your own at home!

    How to make red velvet cupcakes with cream cheese buttercream

    This is what you’ll need: (scroll down for a full printable recipe): Sugar , flour, cocoa powder, baking soda, salt, one egg, oil, vanilla and some apple vinegar.

    Minh Cakes - Red Velvet Cupcakes mit Cream Cheese

    Whisk the egg and sugar together until foamy.

    Minh Cakes - Red Velvet Cupcakes mit Cream Cheese

    In a separate container, mix buttermilk, oil, vanilla and vinegar well. (Read more here about baking with oil in German for now).

    Minh Cakes - Red Velvet Cupcakes mit Cream Cheese

    Now add red food coloring until you have reached maximum saturation. (No matter how much more color you add, the color doesn’t get darker).

    Minh Cakes - Red Velvet Cupcakes mit Cream Cheese

    Add the liquid to the egg-sugar-mixture.

    Minh Cakes - Red Velvet Cupcakes Rezept

    In a separate bowl, mix together flour, cocoa powder, salt and baking soda, and sprinkle those over the batter. Mix gently until just combined.

    The batter is ready! One ice cream scoop per cupcake liner is perfect. Bake for about 18 minutes at 180C.

    Minh Cakes - Red Velvet Cupcakes mit Cream Cheese

    Cool completely and decorate with cream cheese buttercream.
    Minh Cakes - Red Velvet Cupcakes mit Cream Cheese

    Here’s the full recipe to print for you:

    Red Velvet Cupcakes with Cream Cheese by Minh Cakes

    • Servings: 12 Cupcakes
    • Print

    Ingredients

      For the cupcakes:
    • 1 large egg, room temp
    • 150 g sugar
    • 120 ml buttermilk
    • 120 ml oil (I use rapeseed oil with butter flavor such as the brands Sabo bei Coop, or Alba-Öl online)
    • 1 tsp vanilla extract
    • 1 tsp apple vinegar
    • approx. 1/2 tsp concentrated gel color (Rainbow Dust Progel or Sugarflair Red Extra)
    • 125 g flour
    • 1/2 tsp salt
    • 1/2 tsp baking soda
    • 10 g cocoa powder
    • For the Cream Cheese Buttercream:

    • 400 g Swiss Meringue Buttercream
    • 100 g Philadelphia cheese
    • 100 g Mascarpone
    • 3 EL Instant Vanille-Pudding-Powder (with modified starch as thickener)

    Preparation

    Bake the cupcakes Preheat your oven to 180 C (350 F) with normal heat (no fan). Prep your muffin pan with paper liners.

    In a mixing bowl, whisk the sugar and egg until foamy.

    In a separate container, stir together buttermilk, oil, vanilla extract and vinegar. Then add red color until full saturation is reached. Pour the liquid to the egg-sugar foam and mix well.

    In a separate bowl, mix together flour, cocoa powder, salt and baking powder. Sprinkle over the liquid batter and stir gently until just combined.

    Fill the cupcake liners immediately and bake for about 18 minutes, or until a toothpick comes out clean. Remove immediately from the pan and leave to cool on a wire rack.

    Make the cream cheese frosting Make Swiss Meringue Buttercream (SMBC) following my recipe (English version coming soon), then measure out 400g.

    Stir together shortly Philadelphia und Mascarpone. The cheeses MUST be a room temperature for this! Stir in the instant vanilla powder and wait 1-2 minutes to thicken. Stir the cheese gently by hand into the SMBC. Don’t stir too long, or the SMBC could break.

    Assembly: As soon as the cupcakes have cooled down, place the buttercream into a piping bag and swirl it onto the cupcakes. (I used the #1A round tip by Wilton on the photos). Decorate with red velvet crumbs, sprinkles, grated coconut – whatever you please!


    Notes

    These cupcakes are good for about 3 days in the fridge. They are best eaten at room temperature.

    minhcakes.ch/en/red-velvet-cupcakes-with-cream-cheese


    Mmmmh… enjoy!

    Minh Cakes - Red Velvet Cupcakes Rezept
    Have fun making and eating these red velvet cupcakes with cream cheese! Please leave questions and comments below.

    Love,
    Minh signature

    Zum Artikel

  • Elderflower syrup (cordial)

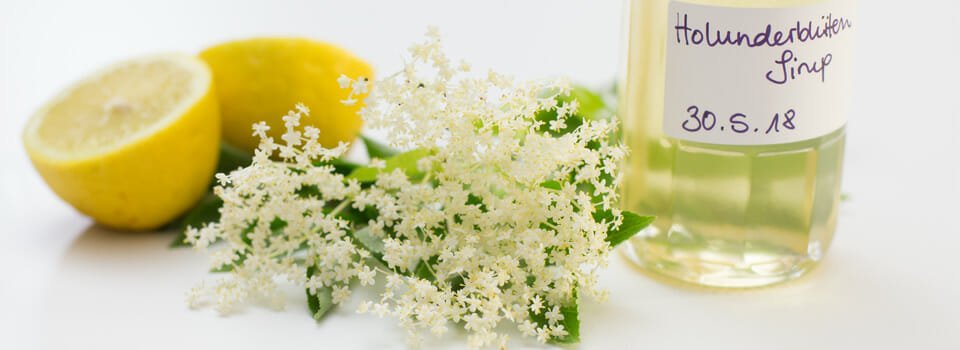
    Holunderblütensirup - Minh Cakes Hauptbild

    Homemade elderflower syrup

    • Servings: 2 l
    • Print

    Ingredients

    • 10 elderflower umbels
    • 1 liter (4 cups) water
    • 1.5 kg sugar
    • 10 g citric acid or 1-2 lemons

    Directions

    1. Pick the elderflower umbels in sunny weather, not right after the rain, or they will have no flavor. Place into the water without washing and marinate for at least 24 hours, up to 4 days.
    2. Strain the elderflower water through a kitchen cloth, then add the sugar and citric acid. Bring to a boil and leave to cook for about 5 minutes.
    3. Fill into steriilized glass bottles and close the bottles immediately. Leave to cool on the counter.

    If you love a more tart flavor, add some more citric acid or add lemon slices to your flowers while marinating. Autor: minhcakes.ch/en/elderflower-syrup

    Happy Syrup-making!
    Love,
    Xuân-Minh
    Xuân-Minh signature

    Zum Artikel

  • Strawberry drip cake with cream cheese filling – recipe

    Hello and welcome! I’m finally blogging for you in English! This strawberry drip cake is the first blog post that I’ve prepared for you.

    I will translate the rest of the blog as I go along. So if you click on any other posts and they are still in German, thanks for understanding! If you want to know what I wrote in them, I invite you to use Google Translate.

    Today’s recipe for you is a fluffy strawberry drip cake with cream cheese filling, covered in white ganache and decorated with strawberry ganache, and fresh berries. Perfect for surprising your mom for mother’s day, a loved one for their upcoming birthday – or any early summer celebration!

    Minh Cakes Strawberry Drip Cake title image

    I know it’s not quite strawberry season yet. But the weather was so bad in the last few weeks, that I needed something to brighten my mood. As soon as our strawberries are ripe, this cake is going to be even better to eat than to look at.

    Be warned: This project, although it looks deceptively simple, can easily take an entire day to make because there are many elements to it! The good news is that you can prepare most of the elements in advance: The sponges, the strawberry puree, the ganache, the Swiss Meringue buttercream, the sugar flowers and the meringue kisses. If you freeze the sponges and the buttercream, just remember to thaw them one day in advance. I’ve written some tips about scheduling your baking in this post.

    The sponge is based on the very versatile  Easy Genoise – this time with strawberry flavor. We’re adding strawberry puree to the batter. To make sure the batter has enough structure, I’m adding a little bit more flour. And the baking soda will combine especially well with the sour elements of the batter (fruit and buttermilk) and make it rise nicely.

    White ganache is pretty sweet – we are countering the sweetness with a generous pinch of salt in the ganache. Salt is great at cutting through overly sweet desserts.

    And a last trick I recently learned from Bravetart: You can optionally add a few drops of rosewater to your strawberry puree to enhance the flavor.

    Minh Cakes strawberry Drip Cake

    Decoration-wise, please be as creative as you like! On my strawberry drip cake, you’ll find chocolate bark made from candy melts, meringue kisses, handmade sugarflowers, fresh berries – and yes! Luxemburgerli by Sprüngli, the best in Zurich 🙂

    Without further ado, here is the Strawberry drip cake recipe for you:

    Strawberry drip cake by Minh Cakes

    • Servings: about 8
    • Print

    Ingredients

      For the strawberry cake (15cm (6″) diameter, 3 layers):
    • 100 g sugar
    • 2 eggs
    • 1/4 teaspoon salt
    • 100 ml buttermilk (plain or strawberry-flavored)
    • 94 g Alba-oil
    • 120 ml strawberry puree (see below)
    • 200 g flour
    • 1.5 teaspoon (8 g) baking powder
    • 0.5 teaspoon (4g) baking soda
    • Optional: Pink food coloring
    • For the strawberry puree:

    • 500 g strawberries
    • 250 g jam sugar (sugar with pectin)
    • 1 tablespoon rosewater (optional)
    • For the Cream Cheese filling:

    • 160 g Swiss Meringue Buttercream
    • 40 g Philadelphia
    • 40 g Mascarpone
    • 2 tablespoons instant vanilla pudding powder (containing modified cornstarch, as a stabilizer)
    • For the white ganache:

    • 300 g white chocolate, chopped
    • 100 ml heavy cream
    • 1 large pinch of salt
    • For the strawberry ganache:

    • 100 g strawberry puree (see above)
    • leftover white ganache from above, after covering the cake
    • Decorations: Fresh strawberries Sugar sprinkles Chocolate bark (homemade or store-bought) Meringue Baisers Macarons Sugar flowers etc…

    Preparation

    Make the strawberry puree Wash the strawberries, dry them well and cut them in fours.

    Put them in a saucepan with the gelling sugar and bring to a boil, stirring from time to time.

    Lower the heat and leave to simmer for 10-15 minutes. Remove the pan from the heat and stir in the rosewater, if using. Strain the strawberries through a meshed sieve. You can freeze the pulp for a future buttercream, today we are only using the reduction. Let the puree cool down.

    Bake the cake Preheat the oven to 180 C (350 F). Line a 15cm (6″) baking pan with baking paper, or grease and flour it.

    Mix flour, baking powder and baking soda in a separate bowl and set aside. Place sugar, eggs and salt in the bowl of your mixer and whip them together for at least 10 minutes on high speed.

    In a separate bowl, stir together the buttermilk, oil, strawberry puree and food coloring (if using – without the food color, your cake will be brown). Turn your mixer to the slowest speed and add the liquid to the eggs and sugar (not too fast, not too slow). Mix for 30-60 seconds, until just combined.

    Now take your flour mixture and fold it very gently into the egg cream. Your mixer should be going at minimum speed, or you can even do it by hand. Fold gently until just combined.

    Immediately pour the batter in your baking pan and place in the oven for approx. 40 minutes, or until a skewer comes out clean. Leave on a cooling grid to cool, remove from the pan after 10-15 minutes. Wrap in cling film as soon as the cake has cooled down. Chill it prior to torting and filling.

    Make the ganache Chop the white chocolate.

    Heat the heavy cream and the salt in a saucepan until it is just below boiling point (do not walk away from it!). Pour it over the chocolate and let it rest for 1-2 minutes, stir by hand and then use a stick blender to emulgate. Be careful to not create too many air bubbles. Leave the ganache to cool at room temperature, until it has the consistency of creamy peanut butter.

    Make the cream cheese filling Make 160g (or more) Swiss Meringue Buttercream, following my recipe.

    Bring the Philadelphia und Mascarpone cheese to room temperature and mix together briefly. Add the instant vanilla pudding powder and wait a few minutes for the mixture to thicken. Fold the cheeses into the SMBC gently, by hand. Do not stir too long.

    Torte and fill the cake: Torte the chilled cake into three layers and fill it with two layers of cream cheese buttercream. You will need approx. 120g buttercream per layer. Chill it for another 30 minutes.

    Cover the cake with ganache: Mask the cold cake with the white ganache. A turntable and an angled spatula are really helpful tools to have for this. Chill for another 30 minutes.

    Make the strawberry ganache Briefly melt your leftover white ganache (you should have about 100g left) and stir in 100g strawberry puree. Whip the mixture on high speed in the mixer for a few minutes, then drip it over the cold cake (you can find a video with my dripping technique in this post).

    Assemble! Now comes the fun part! Place all your decorations on a large plate, so you don’t have to run around looking for them. Place them on the cake, however you like. There is no right or wrong here! Start with the largest elements, then add middle-sized ones, and the smallest last. The ganache stays soft for quite a while, so you have time to adjust your decorations. Put the sprinkles on last, so the don’t sink into the liquid chocolate.


    Note

    This cake keeps 1-2 days in the refrigerator, but it is best enjoyed at room temperature – so take it out of the fridge at least 4 hours before serving.

    minhcakes.ch/en/strawberry-drip-cake


    Mmmmh… enjoy!

    strawberry Drip Cake 04

    Have fun making this strawberry drip cake! If you have questions or have made this cake, please leave a comment below!

    Love and happy baking,
    Minh signature

    Zum Artikel

  • Easy Genoise or the perfect vanilla cake (recipe)

    Happy Easter! What is easy genoise? I’ve been researching different types of sponges lately. There are so many methods of mixing batters and combining sugar, flour, eggs and fats.

    Depending on how you’re planning to use your sponges, you’ll be looking for lighter or a more compact consistency.

    What’s the difference between a sponge cake, a génoise, a chiffon cake, and angel food cake, pound cake etc.? I’ll be exploring this question in this series:

    Easy Genoise Rezept Minh Cakes

    I think you’ll agree with me that we are always searching  for the fluffiest, but still moist and flavorful sponge available. The cake should keep its shape during torting, filling, carving, covering and not crumble apart or sag under the weight. And yet, when we take a bite, it should should feel light and melt in the  mouth. It should not be too dry or too pasty. The cake should have a nice flavor, that complements the flavor of the filling well. Phew- that is a lot of requirements!

    According to cake guru Rose Levy Beranbaum, author of “The Cake Bible” which I’m reading these days, cake mixtures can be spilt into two general categories:

    Group 1: Butter cakes

    These batters are usually mixed with all the ingredients in a single bowl and yield a buttery, denser kind of cake, that is suitable for covering in fondant, carving and that does holds its shape well. While the ingredients can be mixed in several ways, the classic method of butter cake starts by creaming butter and sugar for several minutes in a mixer to create an emulsion, then adding eggs, and finally flour, leavening agent and liquid. Butter cakes have rich buttery taste that can be overwhelming if served in large quantities. They stay moist and fresh almost indefinitely when frozen. Butter cakes include butter cake, pound cake, sand cakes and the english Victoria sponge.

    Group 2: Sponge cakes

    These batters usually get their light and airy texture from separately foamed egg whites or whole eggs. While the most classic sponge is made just from eggs, flour and sugar with no additional fat or baking powder, there exist many variations. While these sponges are delightful to eat thanks to their lightness, they are also very fragile and don’t hold the weight of ganache or fondant very well. They are best served with a light filling such as whipped cream or jam, and without any covering, except for maybe a thin layer of buttercream, or drizzled with ganache. They also tend to dry out more quickly than butter cakes. Sponge cakes include  classic genoise, angel food cake, roulades like Swiss rolls, Pan di Spagna and chiffon cake.

    As you can see, both categories have advantages and drawbacks. And of course, there exist many recipes that are cross-sections and combine techniques from both groups.

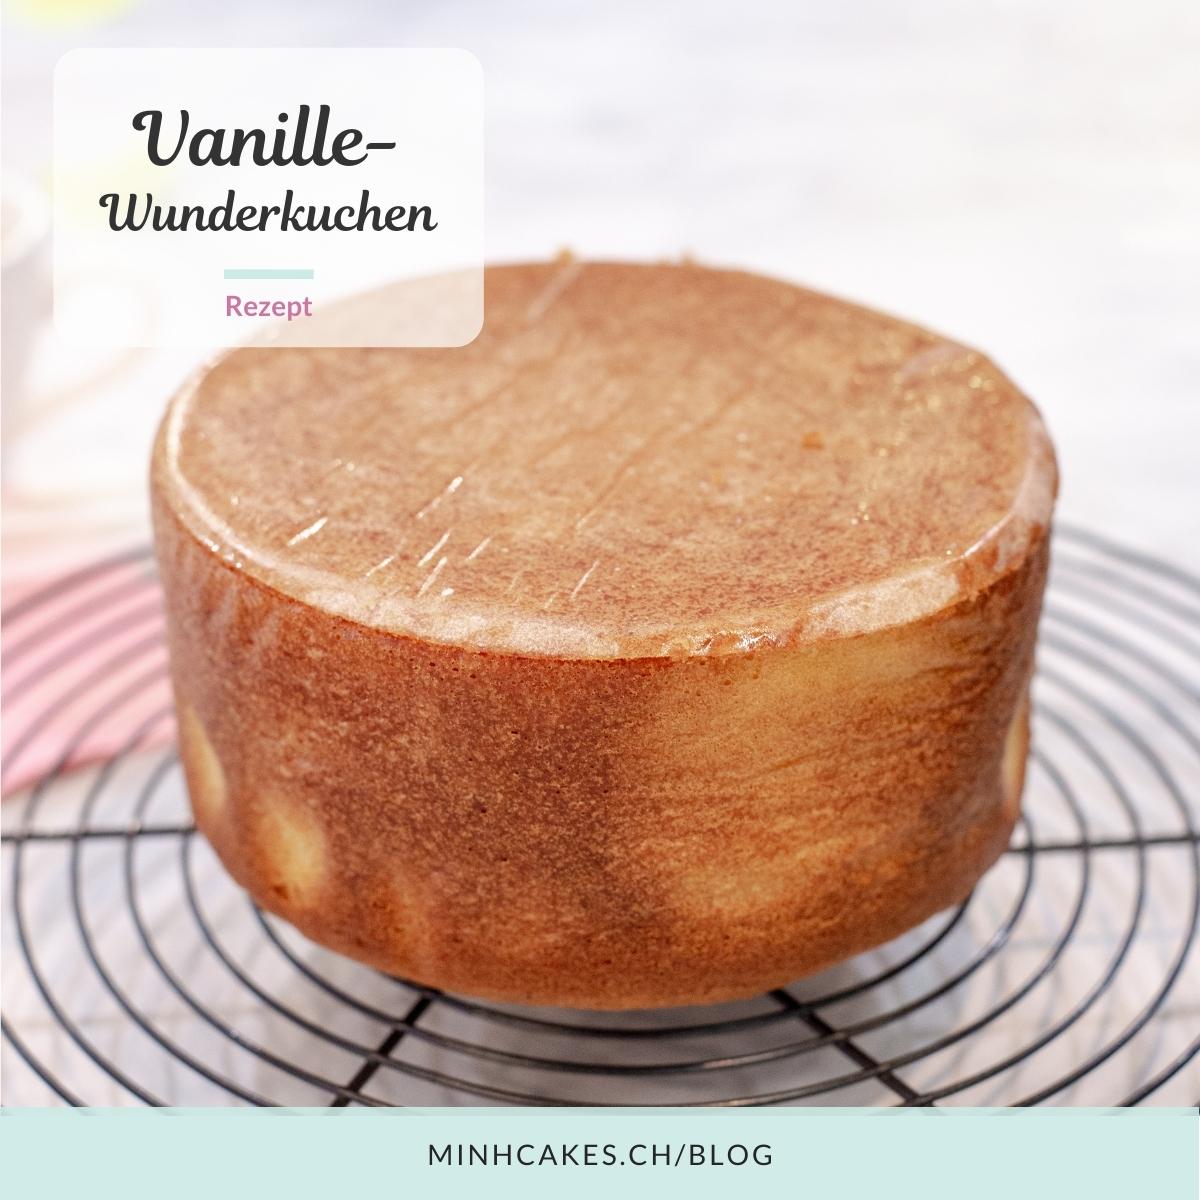
    Just a little while ago, I discovered a great recipe that seems to combine the best properties of both categories: The “Wunderrezept” (wonder recipe) from the German forum “Torten-Talk”. It’s incredibly versatile and you can alter many of the elements to fit your taste. (Here’s a strawberry version for you). Today I’m posting the vanilla version for you – I call it “Easy Genoise” because the mixing method is most similar to a genoise cake.

    It’s a simplified version of the classic genoise (which involves lots of steps like melting butter to a perfect “beurre noisette”, heating eggs over a water bath etc.): In this recipe you can beat the whole eggs with the sugar for at least 10 minutes to create a stable egg foam. Instead of butter, this recipe uses oil (read more about baking with oil in this post). Today we are adding milk as a liquid, but you can use anything you like.

    We only use one bowl to mix everything together. The result: A flat, fluffy, soft and juicy sponge that melts in the mouth but is still stable enough to fill with buttercream and cover in fondant.

    Easy Genoise video instructions:

    And here’s the easy genoise recipe for you:

    Easy Genoise (vanilla wonder recipe)

    • Servings: 8
    • Print

    Ingredients

    • 200 g (1 cup) sugar
    • 4 eggs
    • 1/2 teaspoon salt
    • 200 ml (0.8 cup) milk
    • 185 g  (0.8 cups) vegetable oil (I like butter-flavored oil such as Alba-oil)
    • 3 tablespoons vanilla extract
    • 300 g (2.4 cups) all purpose flour
    • 3 teaspoons (16 g) baking powder

    Preparation

    1. Preheat oven to 180 c (350 F). Line two 20cm (8″) baking tins with baking paper (or grease + flour them).
    2. Place the eggs in a small bowl and cover them with hot tap water for 5 minutes. Then place sugar, eggs and salt in the bowl of your mixer and beat on high speed for at least 10 minutes. If using a hand mixer, go for 15 minutes.
    3. While the mixer is working, in a separate bowl sift together flour and baking powder. Set aside.
    4. Mix together the milk, oil and vanilla in a bowl. As soon as the eggs are ready, turn the mixer to the slowest speed and pour the liquid in swiftly (not too slowly but not all at once either!).
    5. 4. As soon as the milk and oil are mixed with the eggs, fold in the flour mixture very carefully with the mixer on slowest speed or even better, by hand. Mix until just combined.

    6. Immediately pour the batter into your prepared baking tins and place in the oven. Bake for about 40 minutes, or until a toothpick comes out clean.
    7. Let the sponges cool for about 15 minutes on a rack, before unmolding. As soon as they cool down (after 1 hour or so), immediately wrap in cling film to prevent drying.


    The easy genoise keeps in the fridge for 3 days. Freezes well for a month. Always chill prior to torting and filling.

    Please leave your comments or questions below!

    Happy baking!

    Love,
    Minh signature

    Zum Artikel