Cupcakes

  • Tip: Why are my cupcake paper cases peeling off?

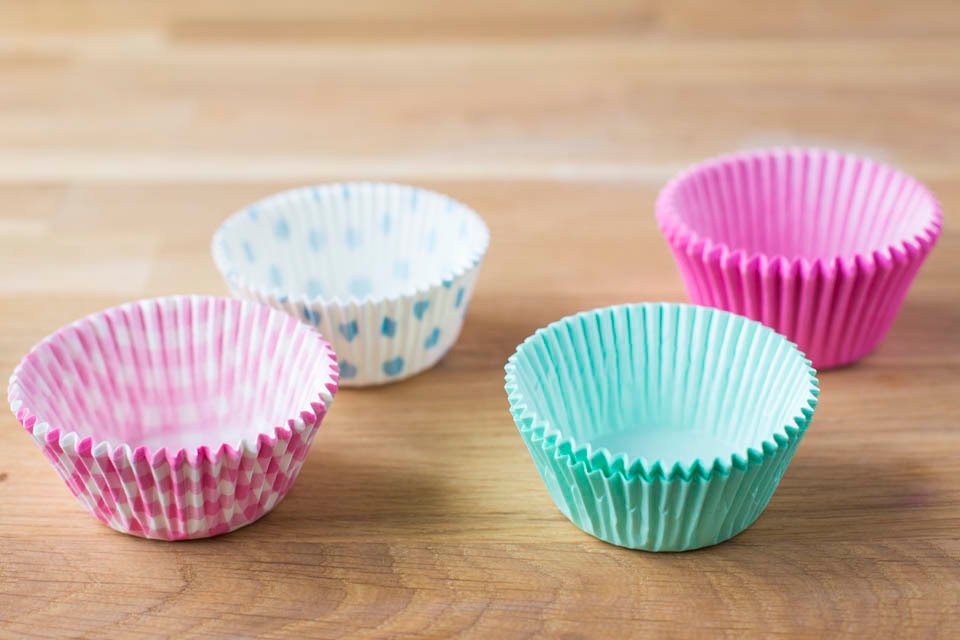
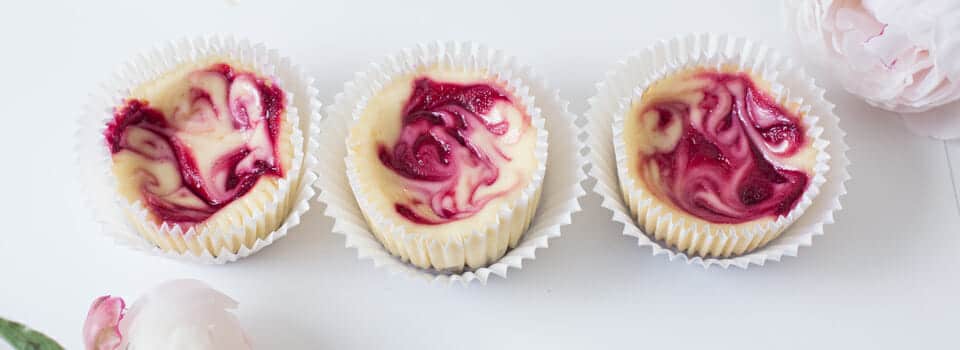
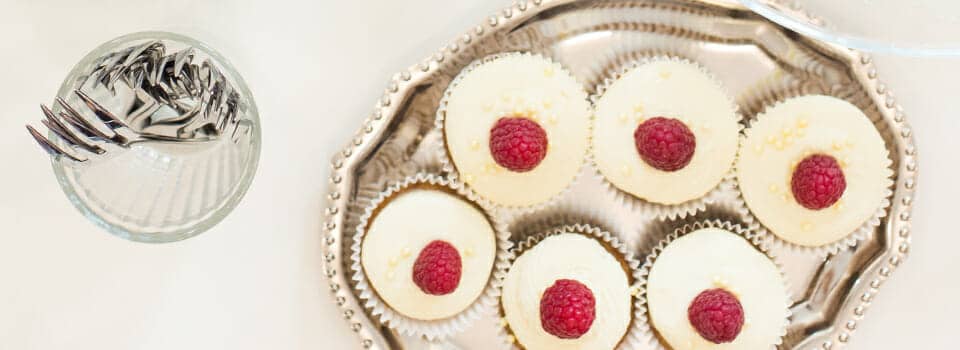
    … and what you can do about it.

    Why do the cupcake liners sometimes come off the finished cake? I get asked this question a lot, and this has bugged me in the past, because the cupcakes look so ugly.

    The main reason: Too much moisture

    The paper loosens when its gets wet. There can be different reasons. Often the problem depends on the recipe, but it can occur if poor quality paper liners have been used or if the cupcakes haven’t been in the oven for long enough.

    In the picture below you can see two different vanilla cupcakes that were baked in the same paper case. The back cupcake turned out perfectly. The front one, another recipe, was unsuitable and the liner is coming off.

    minh-cakes-cupcake-paper-shape-loesen-yourself-cupcake-cases-peel-away-02

    How to prevent this?

    Here are some tips for you to avoid the problem:

    • Leave some moisture out of your recipe. Specifically, this means: experiment with less water, milk, sour cream, eggs, oil, etc.
    • Increase the amount of flour in your recipe.
    • Bake your cupcakes a few minutes longer. The resulting crust can also help “hold” the paper in place.
    • Bake your cupcakes in a high quality, thick-walled baking pan that conducts heat well.
    • Immediately remove the cupcakes from the baking pan after baking so that the condensation from the cooling steam does not additionally moisten the paper.
    • If you soak your cupcakes in syrup after baking, use the syrup sparingly.
    • Let your cupcakes cool completely before storing them.
    • Don’t put your cupcakes in an airtight container, choose a container that allows air to circulate, preferably a cardboard box.
    • Only use grease-repellent cupcake papers that do not soak up the fat from the dough, but stays dry on the outside instead. One of my favorite brands is called “House of Marie”.
    • Best-kept secret: Metallic foil liners work a lot better than paper liners.

    minh-cakes-cupcake-paper-shaped-loesen-yourself-cupcake-cases-peel-away-03

    Pro tip

    Always store your cupcake liners in their original packaging or in a glass so they can’t relax. Once the paper is stretched out, it is too big and no longer makes a nice round shape, as in the picture on the left.

    minh-cakes-cupcake-paper-shape-loesen-yourself-cupcake-cases-peel-away-07

    Once the paper has peeled off, it’s hard to stick it to the cupcake again. If this happens to you, then the most elegant solution is to peel the cupcakes out of the sad paper liner and place them “naked” on a plate before serving!

    Have fun and happy baking!
     Minh signature

    Zum Artikel

  • Express Gumpaste (fondant with cmc)

    How do we make our sugar flowers at Minh Cakes? For our large flowers on our wedding cake, we use traditional Sugar Florist Paste or gum paste.

    It dries very hard and the flowers can even be refrigerated… but the paste itself doesn’t taste good!

    For small flowers on cupcakes and pastries, I prefer using fondant, because of the yummy vanilla flavor. Unfortunately, fondant alone will usually be too soft and sticky to work with when making sugar flowers.

    Here’s a trick: You can use a thickening agent to harden the fondant.  I like to call it “express gumpaste”.

    One of my favorite hardeners is CMC  (Carboxymethylcellulose). It’s the same cellulose gum that’s also found in chewing gum.  It’s also sold by the name “Tylose” or “Tylo powder”.  It’s colorless, odourless and you can use it to thicken any food – you just need a very small quantity.

    minh-cakes-tutorial-xpress-gumpaste-fondant-cmc-tylose-02

    You need about 1/4 teaspoon for 100 grams of fondant.  Knead your fondant for a bit with a little bit of shortening, then place the gum in the middle.

    minh-cakes-tutorial-xpress-gumpaste-fondant-cmc-tylose-03

    minh-cakes-tutorial-xpress-gumpaste-fondant-cmc-tylose-04

    Fold your fondant in half and knead the CMC  well,.

    minh-cakes-tutorial-xpress-gumpaste-fondant-cmc-tylose-05

    From now on your fondant will dry much faster, so you’ll need to wrap it in plastic.

    minh-cakes-tutorial-xpress-gumpaste-fondant-cmc-tylose-06

    Let the CMC  develop its effect in the fondant for at least 24 hours, To prevent drying out, place it in a Ziploc Bag.

    minh-cakes-tutorial-xpress-gumpaste-fondant-cmc-tylose-07

    Done! After 24 hours, you can start using your express gumpaste: Color it, model with it, make flowers with it.

    Cupcake Kurs Bild 2

    Warning:

    Decorations made with this paste will only hold about 1 day in the fridge before softening and ultimately melting. They are best stored  in a cool and dry place, and placed on the cake 1 day before serving at the earliest.

    If you need your decorations to hold up longer in the fridge, I recommend using real sugar florist paste.

     Minh signature

    Zum Artikel

  • Raspberry cheesecake cupcakes

    Tomorrow it’s mother’s day in Switzerland! Surprise your mom with these gorgeous raspberry cheesecake cupcakes. They are sweet and tangy and just the right size for a treat!

    Raspberry cheesecake cupcakes by Minh Cakes: Blog Title image

    I originally found this gorgeous idea from Martha Stewart. This recipe is different though: For the cheesecake filling, I learned a great trick from my student and fellow baker Karolin: She adds sour cream to make it extra creamy. Thank you Karolin!

    You can easily make them 1-2 days in advance, or even freeze them. Your mom is going to love these!

    How to make perfect raspberry cheesecake cupcakes:

    Note: In the video I’m only using two eggs because I prefer the taste, but you may use three eggs for a fuller cheesecake.

    Print the recipe:

    Raspberry cheesecake cupcakes

    • Servings: 12 Cupcakes
    • Print

    Zutaten

    • 180 g graham crackers, or other crunchy caramel cookie
    • 120 g (1/2 cup) raspberry puree
    • 100 g (1/2 cup) sugar
    • 1 tbsp flour
    • 300 g cream cheese
    • 1 tsp grated lemon zest
    • 1 tsp lemon juice
    • 3 large eggs
    • 300 g sour cream, or Crème fraîche
    • 1 tsp vanilla extract
    • 250 g fresh raspberries
    • mint leaves, for decoration

    Directions

    1. Preheat your oven to 150 C (300 F) and place cupcake liners in your baking pan. Weigh all your ingredients.
    2. For the crust: Grind the cookies in a food processor, or using a ziplock bag and a large rolling pin. Place a tablespoon of crumbs into each liner and press it with a glass. Bake for 5 minutes and let cool.
    3. In the meantime, make the raspberry puree, strain it and let it cool.
    4. For the cheesecake filling: In a mixer bowl, combine the sugar and flour. Add the cream cheese, lemon zest and lemon juice and mix until just combined.
    5. Add the eggs one at a time.
    6. Add the sour cream and vanilla and stir gently by hand, until just combined.
    7. With the help of an ice cream scoop, fill the paper liners with the cheesecake filling.
    8. Add two or more drops of raspberry puree to each cupcake. Drag a toothpick through the drops to create hearts, flowers or swirls.
    9. Bake for 20-25 Minutes, leave to cool and then chill in the refrigerator for 4 hours at least, or overnight.
    10. Serve topped with fresh raspberries and mint leaves.
    Author: minhcakes.ch/raspberry-cheesecake-cupcakes

    Raspberry cheesecake cupcakes - blog ending image showing the cupcakes with peonies

    Let me know in the comments how it goes, and what your mama said!

    Love and happy baking,
    Xuân-Minh
    Minh signature

    Zum Artikel

  • Pumpkin cupcakes with cream cheese frosting

    5 years ago, I baked these pumpkin cupcakes for the first time and fell in love with them!

    Minh Cakes - Pumpkin Cupcakes - Kürbis-Cupcakes

    Pumpkin cupcakes with cream cheese frosting are the perfect gift to bring along to your next party, or for halloween! The main ingredient is pumpkin puree. Canned pumpkin is hard to find here in Switzerland – but fortunately, it’s very easy to make from scratch!

    What you’ll need for pumpkin cupcakes

    This is a super easy recipe that you can whip up quickly by hand, using a whisk. You will need:

    Minh Cakes - Pumpkin Cupcakes - Kürbis-Cupcakes

    How to bake the pumpkin cupcakes

    Here’s the recipe for you to print:

    Pumpkin cupcakes by Minh Cakes

    Noch keine Bewertungen
    Print Pinnen Rezept bewerten
    Zubereitung: 30 minutes
    Koch/Backzeit: 20 minutes
    Cooling & icing: 1 hour
    Total: 1 hour 50 minutes
    Ergibt: 12 cupcakes

    Ingredients

    For the cupcakes:

    • 125 g flour
    • 1 tsp baking powder
    • 1/2 tsp baking soda
    • 1/4 tsp salt
    • 1.5 tsp Pumpkin spice mix
    • 250 g Pumpkin puree
    • 2 eggs
    • 110 g brown sugar
    • 110 g white sugar
    • 110 g neutral vegetable oil

    For the cream cheese topping:

    • 300 g Für das Cream Cheese-Frischkäse-Topping: (important: room temperature)
    • 600 g Ppowdered sugar

    Instructions

    For the cupcakes:

    • Preheat the oven to 175 C top/bottom heat and line a muffin tin with cupcake paper cases.
    • In a separate bowl, stir together the flour, baking powder, baking soda, salt and pumpkin spice and set aside.
    • In a large mixing bowl, mix the pumpkin puree and eggs together with a whisk.
    • Add the brown sugar and white sugar and stir well.
    • Stir in the vegetable oil.
    • Finally, carefully fold in the flour mixture from step 2.
    • Using an ice cream scoop, scoop the batter into the paper cases up to approx. 1 cm below the edge. Place in the oven immediately and bake for 20 minutes, then leave to cool.

    For the cream cheese topping:

    • Sieve the powdered sugar.
    • Beat the cream cheese with a mixer until fluffy, but not too long or it will become runny.
    • Add the powdered sugar in 3 batches and mix gently until the cream looks velvety.
    • Pipe the cream onto the cupcakes using the piping nozzle of your choice. The cupcakes should be well cooled for this.
    • Decorate as you wish – for example with handmade pumpkins made from sugar paste.

    Video

    Hast du dieses Rezept ausprobiert?Markiere mich auf instagram mit @minhcakes!

    The tutorial for the cute little sugar pumpkins will follow soon!

    Minh Cakes - Pumpkin Cupcakes - Kürbis-Cupcakes

    Here’s the recipe for you to print:

    Please leave your comments and questions below. Happy baking!

    Love,
    Minh signature

    Zum Artikel

  • Vanilla cupcakes – recipe

    Making great vanilla cupcakes isn’t easy!

    Minh Cakes Vanilla Cupcakes

    When I first started baking, I tested several light vanilla recipes and was disappointed by most of them. The most common issues were:

    • Dry cake
    • Boring flavor
    • Nice flavor, but sunk in the middle and sticky
    • The liners peeled away from the cakes
    • The liners stuck so much to the cake that they were almost impossible to remove

    I often experience this with baked goods: The ones that taste best, are usually the ugliest or they are so soft that it’s difficult to use them for further decorating.

    The reason? The best flavor comes from using sugar and butter. But the higher the sugar and fat content of a cupcake, the softer the end product. Figuring out the right quantities has been a challenge. That’s when I discovered vegetable oil as a great subsitute. I started baking all cupcakes with oil, and have never looked back!

    Minh Cakes Vanilla Cupcakes
    Today I have for you a great recipe for vanilla cupcakes that look and taste great. They are quick to bake and easy to decorate. The oil makes them moist and juicy, but not sticky.

    Everything starts with a good “mise en place”:

    • Line your baking tin with cupcakes liners
    • Preheat your oven
    • Weigh all ingredients and have them ready at hand.

    Let’s begin!

    How to make vanilla cupcakes

    Place sugar, eggs and vanilla in a mixing bowl.

    Minh Cakes Vanilla Cupcakes

    Minh Cakes Vanilla Cupcakes

    Minh Cakes Vanilla Cupcakes

    Beat with a whisk until frothy, about 2 minutes.

    Minh Cakes Vanilla Cupcakes

    Add oil and milk, stir well.

    Minh Cakes Vanilla Cupcakes

    Minh Cakes Vanilla Cupcakes

    Combine flour, salt and baking powder in a separate bowl.

    Lastly, sift in the flour and baking powder. Not too much at a time, stir well but not too long.

    Minh Cakes Vanilla Cupcakes

    One level ice cream scoop is the perfect quantity of batter for one cupcake:

    Minh Cakes Vanilla Cupcakes

    Bake for 20 minutes! And leave to cool on a wire rack.

    Minh Cakes Vanilla Cupcakes

    Here’s the recipe for you:

    Vanilla Cupcakes

    • Servings: 12 cupcakes
    • Print

    Ingredients

    • 140 g (2/3 cup) sugar
    • 3 eggs
    • 1-2 tsp vanilla extract
    • 130 g (2/3 cups) vegetable oil (rapeseed oil, sunflower oil, coconut oil)
    • 60 ml (1/4 cup) milk
    • 140 g (1 cup + 1 tbsp) flour
    • 3 tsp baking powder
    • 1/2 tsp salt

    Directions

    1. Preheat oven to 170 C (350 F). Line the baking pan with the cupcake liners of your choice. Measure all ingredients.
    2. Beat sugar, eggs, and vanilla until frothy (about 2 minutes).
    3. Add vegetable oil and milk, stir well.
    4. In a separate bowl, combine the flour, baking powder and salt. Sift this to the batter, stirring slowly but not for too long.
    5. Fill your cupcake liners with batter, using an ice cream scoop. Bake immediately for 20-22 minutes, or until a skewer comes out clean. After taking out of the oven, remove the cupcakes immediately from the pan and let them cool on a wire rack or on the counter.
    6. Decorate the vanilla cupcakes as you please – for example with Swiss Meringue buttercream.


    Instead of oil, melted butter may be used.

    Will you leave a comment when you bake these cupcakes? I’d love to hear from you!

    Happy Baking!

    Love,
    Minh signature

    Zum Artikel

  • Red velvet cupcakes with cream cheese – recipe

    Today I’ve got a very popular recipe for you:  Red Velvet Cupcakes with Cream Cheese Buttercream.

    If you’ve never heard of red velvet before: It’s a very popular chocolate cake flavor from the US, traditionally decorated with a creamy frosting. People liked to eat it 100 years ago! Back then, the red color was due to the cocoa powder, back then it was not alkalized and turned red from a reaction with the buttermilk. This cake used to be called “devil’s food” cake!Minh Cakes - Red Velvet Cupcakes Rezept

    Today the name is more elegant – “red velvet”. Nowadays, cocoa powder is made alkaline during the production (“dutch process”) and doesn’t turn red anymore. So bakers typically add red food coloring or beet juice to help develop the traditional color. Baking soda also helps the color turn red – but only if used in large quantities, which isn’t really advisable for taste.

    Red Velvet cake has a very mild flavor. It contains a pinch of cocoa, some buttermilk and vanilla extract. The red color makes it fun to eat – and the oil and buttermilk give it a fluffy and velvety consistency. The tartness of the cream cheese goes perfectly with this cake.

    Thanks to the TV series “Sex and the city” and the Magnolia Bakery, red velvet cupcakes have gained worldwide fame.

    And now you can make your own at home!

    How to make red velvet cupcakes with cream cheese buttercream

    This is what you’ll need: (scroll down for a full printable recipe): Sugar , flour, cocoa powder, baking soda, salt, one egg, oil, vanilla and some apple vinegar.

    Minh Cakes - Red Velvet Cupcakes mit Cream Cheese

    Whisk the egg and sugar together until foamy.

    Minh Cakes - Red Velvet Cupcakes mit Cream Cheese

    In a separate container, mix buttermilk, oil, vanilla and vinegar well. (Read more here about baking with oil in German for now).

    Minh Cakes - Red Velvet Cupcakes mit Cream Cheese

    Now add red food coloring until you have reached maximum saturation. (No matter how much more color you add, the color doesn’t get darker).

    Minh Cakes - Red Velvet Cupcakes mit Cream Cheese

    Add the liquid to the egg-sugar-mixture.

    Minh Cakes - Red Velvet Cupcakes Rezept

    In a separate bowl, mix together flour, cocoa powder, salt and baking soda, and sprinkle those over the batter. Mix gently until just combined.

    The batter is ready! One ice cream scoop per cupcake liner is perfect. Bake for about 18 minutes at 180C.

    Minh Cakes - Red Velvet Cupcakes mit Cream Cheese

    Cool completely and decorate with cream cheese buttercream.
    Minh Cakes - Red Velvet Cupcakes mit Cream Cheese

    Here’s the full recipe to print for you:

    Red Velvet Cupcakes with Cream Cheese by Minh Cakes

    • Servings: 12 Cupcakes
    • Print

    Ingredients

      For the cupcakes:
    • 1 large egg, room temp
    • 150 g sugar
    • 120 ml buttermilk
    • 120 ml oil (I use rapeseed oil with butter flavor such as the brands Sabo bei Coop, or Alba-Öl online)
    • 1 tsp vanilla extract
    • 1 tsp apple vinegar
    • approx. 1/2 tsp concentrated gel color (Rainbow Dust Progel or Sugarflair Red Extra)
    • 125 g flour
    • 1/2 tsp salt
    • 1/2 tsp baking soda
    • 10 g cocoa powder
    • For the Cream Cheese Buttercream:

    • 400 g Swiss Meringue Buttercream
    • 100 g Philadelphia cheese
    • 100 g Mascarpone
    • 3 EL Instant Vanille-Pudding-Powder (with modified starch as thickener)

    Preparation

    Bake the cupcakes Preheat your oven to 180 C (350 F) with normal heat (no fan). Prep your muffin pan with paper liners.

    In a mixing bowl, whisk the sugar and egg until foamy.

    In a separate container, stir together buttermilk, oil, vanilla extract and vinegar. Then add red color until full saturation is reached. Pour the liquid to the egg-sugar foam and mix well.

    In a separate bowl, mix together flour, cocoa powder, salt and baking powder. Sprinkle over the liquid batter and stir gently until just combined.

    Fill the cupcake liners immediately and bake for about 18 minutes, or until a toothpick comes out clean. Remove immediately from the pan and leave to cool on a wire rack.

    Make the cream cheese frosting Make Swiss Meringue Buttercream (SMBC) following my recipe (English version coming soon), then measure out 400g.

    Stir together shortly Philadelphia und Mascarpone. The cheeses MUST be a room temperature for this! Stir in the instant vanilla powder and wait 1-2 minutes to thicken. Stir the cheese gently by hand into the SMBC. Don’t stir too long, or the SMBC could break.

    Assembly: As soon as the cupcakes have cooled down, place the buttercream into a piping bag and swirl it onto the cupcakes. (I used the #1A round tip by Wilton on the photos). Decorate with red velvet crumbs, sprinkles, grated coconut – whatever you please!


    Notes

    These cupcakes are good for about 3 days in the fridge. They are best eaten at room temperature.

    minhcakes.ch/en/red-velvet-cupcakes-with-cream-cheese


    Mmmmh… enjoy!

    Minh Cakes - Red Velvet Cupcakes Rezept
    Have fun making and eating these red velvet cupcakes with cream cheese! Please leave questions and comments below.

    Love,
    Minh signature

    Zum Artikel